Barns, Cow Comfort & Equipment
Milking Machine Maintenance Schedule for Small Dairies
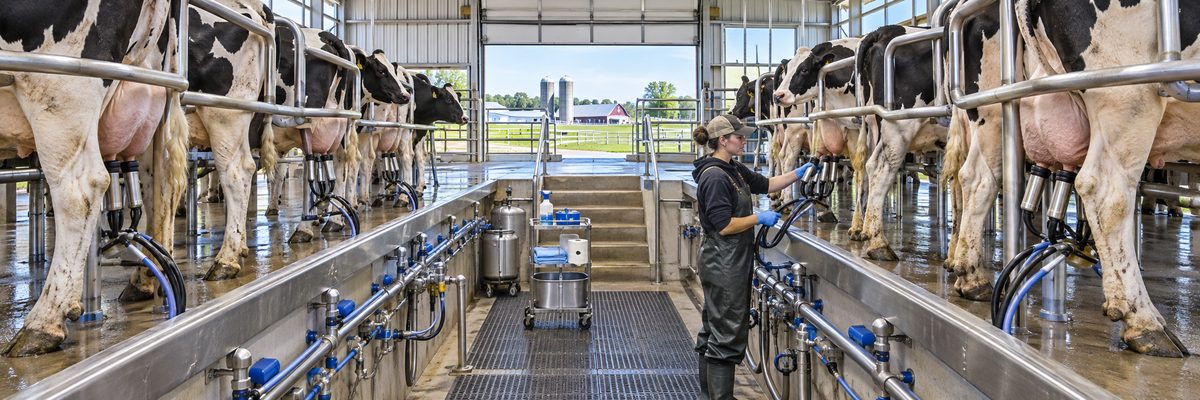
A milking machine is not the kind of equipment you can ignore until it complains. It doesn't complain. It just slowly gets worse, and a few months later your somatic cell count is up, cows are slow to let down, and somebody's blaming the feed. Meanwhile the real culprit is a worn liner or a vacuum regulator that's been drifting since spring.
The answer is a schedule, short enough that it gets done. The version below fits a small dairy, whether you milk in a tiestall with buckets or a pipeline, a small parlor, or a swing setup. Your manufacturer's manual and your dealer's service tech set the specifics for your machine, and this is a framework you can adapt. If you want the lazy summary: look at it every day, clean it right every milking, check the small parts every month, and have the whole system tested by a qualified tech at least once a year.
Every milking: eyes and ears
You're already standing next to the machine, so use the time.
- Listen. Hissing, squealing, or pulsators that sound irregular mean something is leaking or worn. A machine that sounded smooth last week and sounds odd today is trying to tell you something.
- Watch the vacuum gauge. It should hold steady while units are on and during attach and removal. Drops and swings are a warning sign, and the vacuum level for a milking machine deserves a closer look if the needle wanders.
- Look at the liners and claws. Cracks, tears, or liners that slip should be caught right away.
- Check that air vents are open. A plugged claw air bleed can cause slow milking and teat-end problems.
- Confirm the wash cycle did its job. Rinse, wash, and sanitize steps need the right water temperature and cleaning chemical contact. See pipeline wash cycle basics if you're not sure your wash is doing what it should.
Weekly: the quick tour
- Check the vacuum pump oil level or reservoir, if your pump uses oil, and top up with the type the manufacturer specifies.
- Inspect hoses, claws, and shells for cracks, hardness, or odd smells.
- Look at the pulsator lines and any filters for moisture, dirt, or milk.
- Drain the air lines if your system has drains, and check for water in them.
- Make sure the vacuum regulator is clean and the sensing line is clear.
- Look at the bulk tank and cooling equipment while you're at it. Bulk tank cooling requirements matter as much as the machine upstream.
Monthly: the parts that wear
- Pulsators. Check that each one is working evenly, that the rate sounds consistent, and that none are slow or sticking. Clean or service them per the maker's instructions.
- Vacuum pump belts and guards. Look for wear, cracks, and proper tension, and make sure guards are in place.
- Air filters and breathers. Replace or clean them as directed. A clogged filter starves the system.
- Gaskets and seals. Check all the rubber parts on the unit and the milkline: gaskets, O-rings, and any worn fittings.
- Short milk and short pulse tubes. Look for cracks or kinks.
- Wash system. Confirm water temperature and cleaning product concentration per your dealer's or supplier's guidance, and not by guesswork. Wash water temperature and chemicals explains what's involved.
Liners: a schedule you stick to
Liners wear in ways you can't always see. They lose elasticity, crack inside, and start to harbor bacteria. A common approach is to replace them on a set schedule based on milking count or time, according to the liner manufacturer's recommendations, rather than waiting until they look bad. Rotating liner replacement across the system is a poor idea, since mixed ages mean uneven milking. The details are covered in the milking liner change schedule, and your supplier's literature will list how long their liners are meant to last in your type of system.
Put the replacement date on a calendar, not in your head. A good liner on a clean cow works quietly. A tired liner works until the day the teat ends start looking rough.
Yearly (or sooner): the professional test
Once a year at minimum, and again after major changes, have a qualified technician run a dynamic test of the system. That's a test done with the machine running under load, checking vacuum level and stability, pulsation, regulator performance, and reserve capacity. It finds problems you can't see or hear, and it gives you numbers you can compare year to year. Learn what the tester is looking at in the milking system dynamic test. Many dealers and independent service providers offer testing, and some states or milk handlers have their own expectations, so ask your milk buyer or field rep.
The National Mastitis Council publishes recommended practices on milking system function and udder health, and it's a good reference to share with your technician.
A simple schedule at a glance
| When | What to do |
|---|---|
| Every milking | Listen, watch the gauge, check liners and air vents, confirm washing |
| Weekly | Pump oil level, hoses and claws, air line drains, regulator and filters |
| Monthly | Pulsators, belts, gaskets, tubes, wash temperature and concentration |
| Per supplier schedule | Liner replacement, pump service, filter changes |
| Yearly or after changes | Professional dynamic test and system check |
Signs the machine is telling you something
- Cows slow to milk out, or units that crawl up the teat.
- Liner slips, or units falling off during milking.
- Rising somatic cell count or new clinical mastitis with no other explanation. Compare notes with a milk quality advisor, and see lowering bulk tank SCC for the other places to look.
- Rough or red teat ends, or ring-like swelling at the teat base after milking.
- Cows kicking, stomping, or refusing to settle in the stall.
- Noisy pump, hot motor, or an oily smell near the vacuum pump.
A machine that's gone slightly odd is a lot like a cow that's gone slightly quiet: it's a signal to look closer before it turns into a bigger problem. Keep a log of what you check and what you find, even if it's a notebook hanging from a nail by the milkhouse door. When the tech arrives, you can hand over a list instead of saying "it's been weird."
Equipment on a dairy has a talent for picking the worst possible moment to misbehave. If you've ever thought yours was possessed, this farm.FM cowboy poem about possessed farm equipment will make you feel less alone, and a maintenance log is the closest thing to an exorcism you'll find at the farm supply.
When to call a pro
- Vacuum level won't hold steady or the regulator is hunting.
- Pulsators run unevenly after cleaning.
- Electrical issues of any kind. Cows that are jumpy at the milking unit may be dealing with stray voltage, which is a job for an electrician and a utility, as covered in stray voltage in the milking barn.
- Anything you don't understand and can't see.
Skip the clever home repairs on vacuum components. Tinkering with a regulator by feel is a good way to turn a small problem into an expensive one, and into a mastitis one.
Quick answers
How often should a milking machine be tested?
At least once a year by a qualified technician, and again after changes such as new equipment, major repairs, or unexplained milking or udder health problems. Ask your dealer and milk buyer what they recommend.
How often should milking liners be changed?
Follow the liner manufacturer's guidance, usually based on a set number of milkings or a time period, and replace them all at once. Don't wait for visible damage. Worn liners can hurt milk-out and teat condition before they look bad.
What is the most overlooked part of milking machine maintenance?
Small things: clogged air vents, dirty regulators, and neglected filters. They're easy to skip and cheap to fix, and they're often behind slow milking and vacuum swings. A short routine catches most of them.