Attaching and Removing Milking Units the Right Way
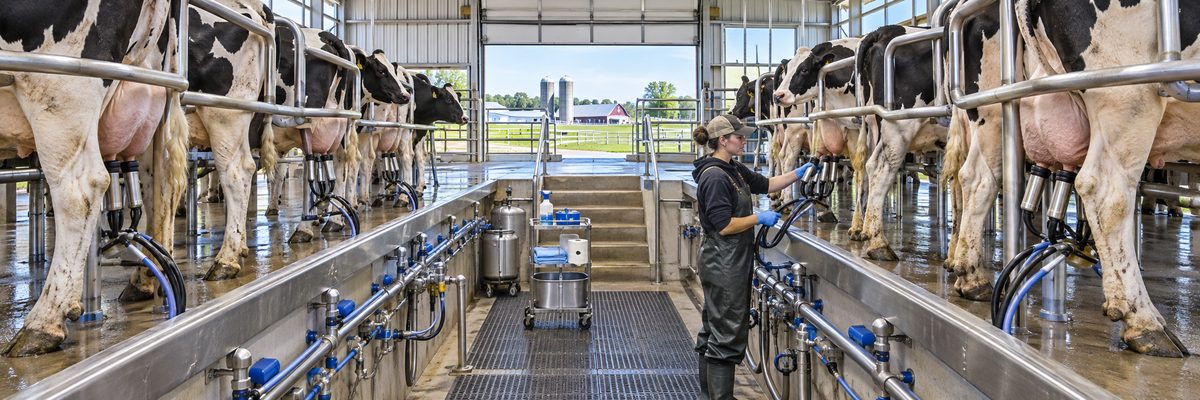
A milking unit goes on in a few seconds and comes off in a few more, which is exactly why people get sloppy with it. Do it right and the cow empties out quickly, the liners stay put, and the teat ends look the same at the end of lactation as they did at the start. Do it wrong and you get slipping, squawking, fallen clusters and a slow creep in somatic cell count.
The short version: attach the unit after the cow has been prepped and has had a little time to let milk down, keep air from rushing in while you put the teat cups on, hang the unit so the claw sits level and the cups pull straight, and take it off only after the vacuum has been shut off. Never rip a unit off a cow that is still holding on to it.
Think of the unit as a very polite stranger. It should arrive when expected, sit quietly, and leave without a scene.
Timing: Let the cow be ready first
Attachment timing is tied to the cow's let-down reflex. Touching the teats during prep sends the signal that releases oxytocin, and milk starts moving into the cistern. The usual target in a well-run routine is to get the unit on roughly one to two minutes after prep begins, so you are catching that surge instead of racing it or missing it. Attach too early and the cups are milking a half-empty teat, which means the liner is squeezing a teat end that has nothing in it. Attach too late and the cow has already begun to lose that let-down, and milk flow comes out slow and ragged.
That is why a consistent milking routine matters more than any single trick. The same steps in the same order, cow after cow, give you a predictable interval. When the routine wanders, so does the attach time, and the parlor starts to sound like a bad band. If you are seeing cows hold up milk, the cause is often a rushed or inconsistent start, which is covered in milk let-down problems and how to fix them.
Step by step: putting the unit on
- Finish the prep. Teats should be clean, dry and forestripped before any cup touches them. If you are still deciding which steps belong where, see pre-milking teat prep, step by step. A wet or dirty teat end is the front door for bacteria, and the unit will happily push them up.
- Bring the unit under the cow with the claw held up and the cups hanging. Most people pick up the claw with one hand and use the other to guide the cups. Let the short milk tubes hang straight instead of twisting.
- Crimp or kink the short milk tube as you go, or use the cup's own shutoff. The goal is to keep vacuum from dropping at the claw when a cup is open to the air. Pull one cup at a time up to its teat, let the teat enter the liner, and release the tube so vacuum takes hold. Do it for the closest teats first, then the far ones, or whatever order fits your barn and your reach.
- Do not let air whistle in. The hiss you hear is air entering a cup while the others are attached. That air pushes milk and sometimes bacteria toward the teat end of a neighboring quarter, and it is a classic cause of liner slips.
- Check the position. The claw should hang below the udder, level, with the long milk tube and long pulsation tube coming out and falling without kinks. Adjust the unit height or use a support arm or alignment device if the barn has one.
- Watch the first thirty seconds. Liners should sit squarely on the teat with no creeping up toward the udder base. If a cup is crawling, take it off, wait a few seconds, and reattach.
Alignment: where most problems start
Alignment sounds like an engineering word, but it is just whether the unit is pulling straight down or twisting a cup sideways. A twisted or crooked claw leads to uneven milking, with one quarter finishing early and being milked dry while the rest of the cluster catches up. That overmilked quarter is the one that comes up with a ring around the teat end. If you are curious how to spot it, teat end scoring gives you a way to look and keep score.
A few things worth checking at every milking:
- The claw hangs level, not tilted toward the near side.
- The hoses are not wrapped around a hind leg, the tail, or the neighbor's udder.
- The unit is not pulling forward or backward so hard that it distorts the teats.
- The weight of the unit is supported evenly. A heavy unit hanging on one teat is a recipe for slips.
Cows with oddly shaped udders, tight rear quarters or one badly placed teat need extra attention. A cow with a teat sticking out sideways will often hold a cup crooked no matter what you do, and the honest answer might be to put her at the end of the line where you can fiddle with her.
Removing the unit without pulling
Removal is as important as attachment, and it is where people get impatient. The principle is simple: do not pull the unit off while it is still under vacuum. Pulling breaks the seal under full vacuum and can drag the teat end into the liner mouth and then yank it out, which is hard on tissue. It also lets a burst of air up the teat, and cows that experience it remember.
- If you remove by hand, wait until milk flow has dropped to a trickle, shut the vacuum off at the claw (most claws have a shutoff valve or a way to kink the long milk tube), count a few seconds for the vacuum to fall, then ease the cups off.
- If you have automatic take-offs, the unit should do this for you, but the settings still matter. A threshold set too low lets the unit run on dry teats, and one set too high pulls it off while milk is still there. Your equipment dealer or milk quality specialist can help you set the threshold and delay.
- Do not hang the unit on the cow to finish. Pulling down on the claw to get the last of the milk is a habit that goes back generations, and it is harder on teats than the extra pound is worth.
Once the unit is off, dip the teats promptly with your post-milking dip. The teat canal stays open for a while after milking, so the dip needs to be on before the cow walks away.
Common mistakes to avoid
- Attaching before prep is finished, because the line is moving and the herd is waiting.
- Letting cups hang open and hiss while you wrestle with the last teat.
- Pulling units off a cow that is still milking out. The cow will tell you in the usual way, with a kick.
- Ignoring vacuum. If the unit keeps dropping or the cups keep climbing, check the vacuum before you blame the cow. The numbers worth looking at are laid out in what vacuum level your machine should run.
Where practices differ
A tiestall barn in Wisconsin, a flat barn parlor in New York, and a rotary with sixty units in the Southwest do not attach cows the same way. In a rotary, the pace is set by the platform, so every step has to fit a fixed window and a good routine is nearly a necessity. In a tiestall, the milker has more time per cow but also more chances to wander. Grazing dairies that milk seasonally may be training a whole group of fresh heifers at once and need patience more than speed. The principles above stay the same, but your team's version of them should be written down and practiced. For deeper protocol material, the National Mastitis Council's protocols and guidelines page and the Michigan State University milk quality program are good places to find recommended milking procedures.
Quick answers
How long after prep should I attach the milking unit?
Most recommended routines aim for about one to two minutes after prep begins, as long as the process is the same for every cow. The goal is to catch the let-down, so consistency matters more than hitting a particular number on the clock.
Why do my cups keep climbing up the teat?
Common causes include a poorly aligned unit, worn or stiff liners, vacuum that is too low or unstable, and a unit that is too heavy for the cow. Check alignment and liners first, then ask your equipment dealer to test the vacuum.
Should I strip the cow after the unit comes off?
Machine stripping and heavy hand stripping are generally discouraged because they add time and stress without much benefit. If a cow regularly leaves milk behind, look into let-down, vacuum and take-off settings, and ask your herd vet about it.