Training New Milkers: A First-Week Checklist
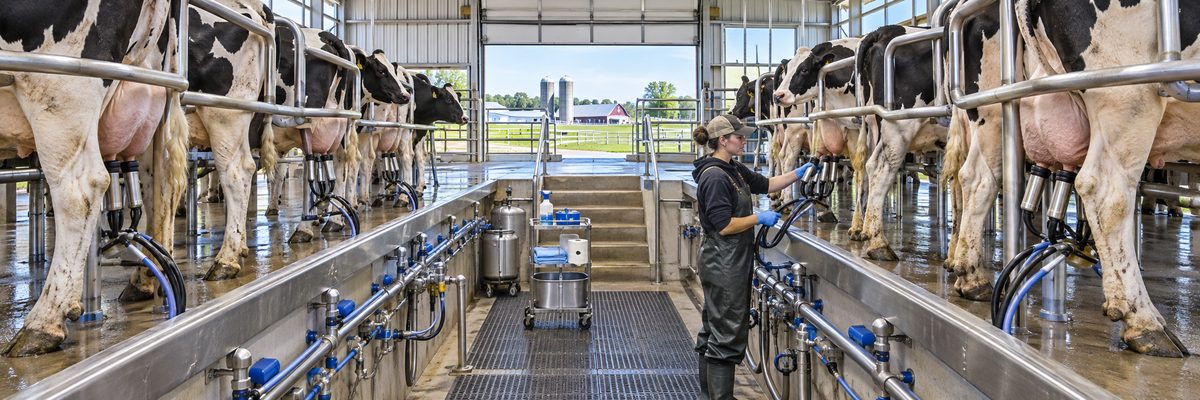
Hiring a milker and handing over the parlor on day one is a bit like giving someone the keys to the tractor and wishing them luck. It works out sometimes. Other times you find out about the vacuum pump at the same moment as the bulk tank hauler does.
A good first week has three goals: keep the new person safe, teach the routine exactly as you want it done, and make sure nobody's milk or cow health depends on guesswork. Safety first, then routine, then speed. Speed comes on its own. Bad habits don't leave.
Before day one
- Write the routine down. If the only copy lives in your head, so does every disagreement about it. One page, with steps in order and photos if you can.
- Pick a trainer. One experienced milker who does it right, not three people who do it three ways.
- Gather the paperwork. Payroll forms, safety acknowledgements, emergency contacts. The general hiring side is covered in a first-week onboarding plan for new dairy employees, so this checklist sticks to the parlor.
- Check language needs. Training in a language a person understands beats training them in the one you wish they spoke. Use translated instructions, pictures and demonstrations as needed.
- Have the right gear ready. Boots that grip, gloves, waterproof clothing and hearing protection if the parlor is loud.
Day one: safety and a walk-through
Spend the first day watching, not milking. Walk the barn and show every place where something can go wrong.
- Animal handling. Cows are large and can kick, step and crush. Teach where to stand, how to approach from the side, and how to move cows calmly. Never hit or shout. It's both a welfare issue and a quality one, because stressed cows hold up milk.
- Slips and falls. Wet concrete and manure are the biggest daily hazards. Point out the worst spots.
- Chemicals. Show the cleaning and sanitizing chemicals, how to read labels, where safety data sheets are kept, and which products must never be mixed. Make clear that they don't pour anything from one jug into another.
- Machinery and power. Pumps, gates, belts and electrical panels. Who may touch what, and who to ask.
- Emergency plan. Where the first-aid kit is, who to call, and what to do if a cow goes down or someone is hurt.
Days two and three: shadow the routine
Let the new person do the steps while the trainer watches. Start with the parts that matter most for milk quality. A guide like setting up a consistent milking routine can be adapted into your own written steps. The core sequence is the same on most dairies:
- Forestrip each quarter and look at the milk for clots, flakes or watery milk.
- Apply pre-dip, allow the contact time on the label, then wipe thoroughly. Pre-milking teat prep, step by step covers the details.
- Attach the unit at the right time, without air getting in, with the claw hung evenly.
- Remove the unit properly, cutting off vacuum first if the system requires it, and apply post-dip to every teat.
Keep an eye out for mistakes that seem small but add up: wiping with a dirty towel, skipping forestripping on a busy shift, or letting units slip and suck air. The trainer should correct them immediately and kindly. Nobody learns anything useful from a lecture delivered over a screaming vacuum pump.
Day four: milk quality and treated cows
This is the day to cover the rules that protect your milk check.
- Identify cows that need special handling. Fresh cows, cows with clinical mastitis and cows under treatment are marked, and the marker system should be taught clearly. The milking order for fresh and treated cows shows one way to keep them separate.
- Explain withholding. Milk from treated cows must be kept out of the bulk tank for the time the herd veterinarian and label specify. New milkers shouldn't guess about this. The reasons and the record-keeping are in preventing antibiotic residues in the bulk tank.
- Teach what's abnormal. Clots, discolored milk, hot or swollen quarters, a cow that's off feed. Who gets told, and how.
- Cleaning and sanitation. The wash routine, temperatures and chemical steps for the system. Show the full cycle and let them do it with supervision.
Never tell a new milker to "use your judgment" on withholding or treatment. They should follow the herd's written protocol, which your veterinarian helps set, and ask when something doesn't fit.
Days five and six: independent with checks
Now the milker runs a string while the trainer watches and spot-checks. Use a short list of things to look at each shift:
- Teats are clean and dry before unit attachment.
- Units are attached smoothly, with little air noise.
- Post-dip coverage is complete.
- Abnormal milk was reported and the right cows were marked.
- Gates and cow movement were calm.
Praise what's right out loud. People who hear what they did well repeat it.
End of the week: review
- Sit down with the milker and go through what's working and what's confusing.
- Ask them to explain a few key steps back to you, in their own words. If they can't, the training isn't finished.
- Review safety once more, including near-misses.
- Set expectations for the second week and who to call with questions.
- Check cell count, bacteria count and teat condition in the following weeks for any changes that coincide with the new hire.
Training doesn't stop after a week. Many dairies refresh the whole crew periodically, which also keeps old hands from drifting into shortcuts. For broader guidance on milk handling and mastitis prevention, see the National Mastitis Council and UW-Madison Extension.
Quick answers
How long does it take to train a new milker?
Basic competence often takes a week or two, but full speed and good judgment take longer. Plan to check their work for the first month, especially on teat prep, treated cows and sanitation.
What is the most important thing to teach a new milker?
Safety around cows and chemicals, followed by the teat prep routine and the rules for treated cows and milk withholding. Those protect the person, the cows and the milk.
Should a new milker handle treated cows on their own?
Not until they've been trained on your marking system and withholding records. Start by having an experienced milker handle those cows, then bring the new person in under supervision.